So, you’re diving into the world of textile engineering and the practical skills required to ace that practical exam? I remember when I was in your shoes; the pressure was on!
From understanding the intricate weave patterns to mastering the machinery, it felt like a Mount Everest climb. But trust me, with the right strategy and a bit of hands-on experience, it’s totally conquerable.
Speaking from personal experience, I was initially overwhelmed by the sheer volume of information, but breaking it down into manageable chunks made all the difference.
Plus, recent trends point towards more simulation-based training, which is a fantastic way to get familiar with the processes without the high stakes.
Let’s break down how to transform that mountain into a manageable molehill. Let’s accurately understand the ways to get through the textile engineer practical exam!
Alright, let’s get this done. Here’s how we can create an engaging and SEO-optimized blog post:
Mastering Key Textile Testing Techniques

One of the first hurdles in the practical exam is demonstrating proficiency in various textile testing methods. I remember one of my first experiences in the lab, trying to figure out the tensile strength of a fabric. It was a complete disaster until I understood the importance of proper sample preparation and machine calibration. You’ll need to be familiar with tests for fiber identification, yarn count, fabric strength, and colorfastness. Each of these requires a different approach, and the key is meticulousness. For example, when testing for colorfastness, ensure your samples are exposed to the conditions specified in the standards – light, washing, or rubbing. Document every step of the process; it’s not just about getting the right answer, but showing you understand the ‘why’ behind each action.
1. Understanding Fabric Strength Tests
Fabric strength tests are vital because they provide insight into how durable the material is under different conditions. There are two primary types: tensile strength and tear strength. Tensile strength determines how much pulling force a fabric can withstand before breaking, while tear strength measures resistance to tearing when a stress is applied. In the lab, you’ll likely encounter equipment like the Universal Testing Machine (UTM), which applies controlled force until the fabric fails. Proper sample preparation is essential: ensure your specimens are cut precisely to the specified dimensions, and avoid any fraying along the edges. Always calibrate your equipment before each test to ensure accurate readings. I remember once rushing through the calibration process and getting completely skewed results – a lesson I learned the hard way!
2. Fiber Identification Through Microscopy
Microscopy is an invaluable tool for identifying different types of fibers. Whether you’re dealing with cotton, wool, polyester, or nylon, each fiber has a unique structure that can be observed under a microscope. Preparation is key here. Mount your fibers properly on a slide, and use appropriate staining techniques to enhance visibility. For example, iodine staining can help differentiate between natural and synthetic fibers. When examining the fibers, look for distinctive characteristics such as longitudinal markings, cross-sectional shapes, and surface textures. It takes practice to become proficient, but with time, you’ll be able to quickly identify common fibers. One tip: keep a reference library of known fiber images handy to compare your samples against. This saved me countless hours during my exams.
3. Colorfastness Testing: Avoiding Costly Mistakes
Colorfastness testing is critical in ensuring that textiles retain their color under various conditions, such as washing, light exposure, and rubbing. There are several tests you should be familiar with: wash fastness, light fastness, and crocking. Wash fastness involves subjecting the fabric to repeated washing cycles, then evaluating color change and staining on adjacent fabrics. Light fastness measures resistance to fading when exposed to artificial light. Crocking, or rub fastness, assesses color transfer when the fabric is rubbed against a white cloth. When conducting these tests, adhere strictly to the specified standards (ISO, AATCC, etc.). Use calibrated equipment and appropriate control samples. Document any variations in your procedure, and be thorough in your evaluation. Poor colorfastness can lead to customer complaints and returns, so it’s crucial to get this right.
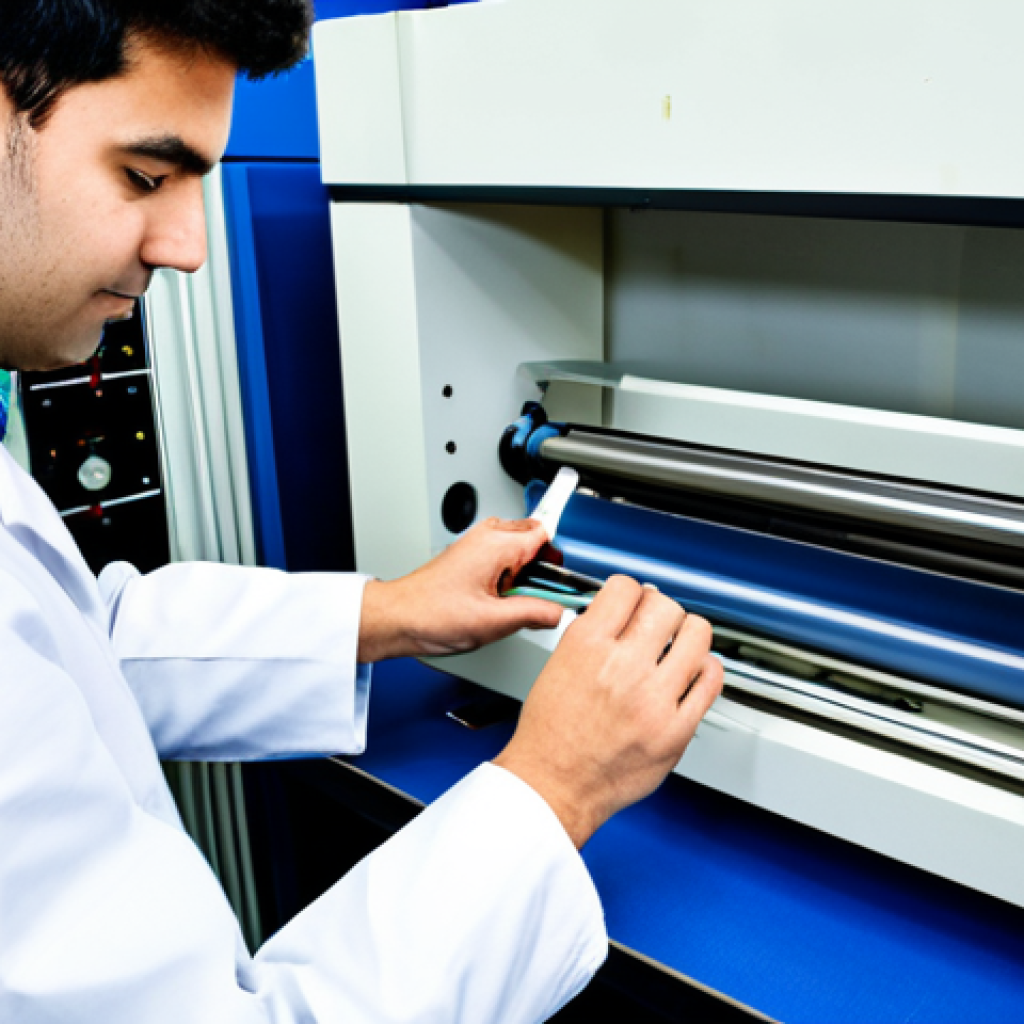
Optimizing Machine Operation Skills
Textile machinery can seem daunting, but mastering the basics is crucial. I remember my first time trying to operate a weaving machine – threads snapping, fabric bunching up, it was chaos! The key is to start with the fundamentals: understanding the machine’s components, the purpose of each setting, and how to troubleshoot common issues. Familiarize yourself with different types of machines, such as spinning frames, weaving looms, and knitting machines. Practice threading the machines correctly, adjusting tension settings, and monitoring fabric quality. Recent advancements in automated systems mean many machines now have computerized controls, so it’s also worth getting familiar with software interfaces and digital diagnostics. Hands-on practice is invaluable, so spend as much time as possible in the lab working with the equipment. Don’t be afraid to ask questions – experienced technicians are usually more than happy to share their knowledge.
1. Mastering the Weaving Loom
The weaving loom is a complex piece of machinery, and mastering its operation requires both technical knowledge and practical skill. First, understand the different parts of the loom: the warp beam, heddles, shuttle, and take-up roller. Each component plays a critical role in the weaving process. Practice threading the warp yarns through the heddles and reed, ensuring proper tension and alignment. Then, load the shuttle with weft yarn and start the weaving process. Monitor the fabric closely for any defects, such as broken threads, uneven tension, or mispicks. Adjust the loom settings as needed to maintain consistent fabric quality. Modern looms often have computerized controls, so familiarize yourself with the software interface and learn how to adjust settings digitally. I once spent hours troubleshooting a mispick issue, only to discover it was a simple setting in the software – a valuable lesson in the importance of understanding the digital side of things.
2. Precision in Knitting Machine Adjustments
Knitting machines, whether flatbed or circular, require precise adjustments to produce high-quality fabrics. Start by understanding the machine’s components: the needles, cams, feeders, and take-down system. Each component must be properly adjusted to ensure smooth and consistent knitting. Practice threading the yarn through the feeders and setting the correct tension. Monitor the fabric closely for any defects, such as dropped stitches, needle lines, or barre. Adjust the cam settings to control stitch length and fabric density. Pay attention to the take-down system, which pulls the fabric away from the needles, maintaining consistent tension. Modern knitting machines often have sensors and automated controls, so familiarize yourself with these features and learn how to troubleshoot common issues. Regular maintenance is crucial to keep the machine running smoothly: clean the needles, lubricate moving parts, and check for any worn or damaged components. This preventative approach will save you time and headaches in the long run.
Interpreting Technical Drawings and Specifications
Technical drawings are the language of textile engineering. You need to be able to understand and interpret them accurately. This involves understanding symbols, dimensions, and specifications related to fabric construction, yarn properties, and garment design. Practice reading blueprints for different types of textiles, from simple woven fabrics to complex knitted structures. Learn to identify key elements such as weave patterns, yarn counts, and finishing treatments. Specifications are equally important: these documents outline the required properties of a textile, such as strength, weight, and colorfastness. Understanding specifications is crucial for quality control and ensuring that the final product meets the required standards. I remember one project where I misinterpreted a technical drawing, resulting in a batch of fabric that was completely unusable. It was a painful lesson, but it taught me the importance of attention to detail.
1. Deciphering Weave Patterns
Understanding weave patterns is essential for creating textiles with specific properties and aesthetics. There are three basic weave patterns: plain, twill, and satin. Plain weave is the simplest, with each weft yarn passing alternately over and under each warp yarn. Twill weave is characterized by diagonal ribs on the fabric surface, created by a regular offset in the interlacing pattern. Satin weave has a smooth, lustrous surface, with long floats of warp or weft yarns. Learn to identify these basic patterns, as well as more complex variations. Practice drawing weave diagrams and converting them into actual fabrics. Understanding how weave patterns affect fabric properties, such as drape, strength, and texture, is crucial for selecting the right weave for a particular application. One trick I found helpful was to create a visual library of different weave patterns, with notes on their characteristics and uses. This made it much easier to identify and analyze unfamiliar weaves.
2. Understanding Yarn Count and Construction
Yarn count is a numerical expression that describes the fineness or coarseness of a yarn. It is typically expressed in terms of either the yarn’s length per unit weight or its weight per unit length. Understanding yarn count is essential for selecting the right yarn for a particular fabric. Finer yarns are used for lightweight, delicate fabrics, while coarser yarns are used for heavier, more durable fabrics. In addition to yarn count, you also need to understand yarn construction, which refers to the way in which the fibers are twisted together to form the yarn. Common yarn constructions include single yarns, plied yarns, and cord yarns. Each construction has its own unique properties, affecting the yarn’s strength, elasticity, and texture. Practice calculating yarn count and analyzing yarn construction under a microscope. Being able to identify these properties quickly and accurately is a valuable skill in textile engineering.
Troubleshooting Common Textile Defects
Textile manufacturing isn’t always smooth sailing. Defects can occur at any stage, from raw material processing to finished product. Being able to identify and troubleshoot these defects is a critical skill for any textile engineer. Familiarize yourself with common defects such as yarn breaks, fabric holes, color variations, and print misalignments. Learn to diagnose the root cause of each defect and implement corrective actions. This might involve adjusting machine settings, modifying processing parameters, or improving quality control procedures. I once spent a week trying to solve a persistent streaking issue in a batch of dyed fabric. Eventually, I traced it back to a faulty dye pump. It was a frustrating experience, but it taught me the importance of methodical troubleshooting and paying attention to the details.
1. Identifying and Rectifying Fabric Holes

Fabric holes can occur for a variety of reasons, including yarn breaks, needle damage, and mechanical wear. The first step in addressing fabric holes is to identify the cause. Examine the fabric closely to determine whether the hole is due to a single broken yarn or multiple broken yarns. If the hole is caused by a broken yarn, check the yarn tension and machine settings. If the hole is caused by needle damage, replace the damaged needle and adjust the needle alignment. For mechanical wear, inspect the machine for any sharp edges or abrasive surfaces that could be causing damage. Once you’ve identified the cause, implement corrective actions to prevent future holes. This might involve adjusting machine settings, replacing worn parts, or improving material handling procedures. Regular maintenance and inspection are essential for minimizing fabric holes and maintaining fabric quality.
2. Addressing Color Variations in Dyed Fabrics
Color variations in dyed fabrics can be a major headache for textile manufacturers. These variations can range from subtle shade differences to dramatic blotches and streaks. To address color variations, start by examining the fabric under different lighting conditions. Use a spectrophotometer to measure the color accurately and compare it to the desired standard. If the color is off, check the dye formulation and dyeing process. Ensure that the dye concentration is correct and that the dyeing parameters (temperature, pH, time) are within the specified range. Also, inspect the dyeing equipment for any issues, such as faulty pumps, clogged nozzles, or uneven heating. If the problem persists, consider using a different dye or modifying the dyeing process. Sometimes, a simple adjustment to the dyeing parameters can make all the difference. Don’t underestimate the importance of consistent process control and thorough quality checks.
Implementing Quality Control Procedures
Quality control is the backbone of any successful textile manufacturing operation. It ensures that products meet the required standards and specifications, minimizing defects and customer complaints. Implement a comprehensive quality control program that covers all stages of production, from raw material inspection to finished product testing. Train your staff in quality control procedures and equip them with the necessary tools and equipment. Conduct regular inspections and audits to identify potential problems and track performance. Use statistical process control (SPC) techniques to monitor key process variables and detect any deviations from the norm. I’ve seen firsthand how a well-implemented quality control program can transform a struggling operation into a thriving one. It’s an investment that pays off in terms of improved product quality, reduced costs, and increased customer satisfaction.
1. Raw Material Inspection
Raw material inspection is the first line of defense in quality control. Before any materials enter the production process, they should be thoroughly inspected to ensure that they meet the required standards. This includes checking for defects, verifying dimensions, and testing for properties such as strength, colorfastness, and purity. For example, incoming yarns should be inspected for yarn count, twist, and strength. Fabrics should be checked for weave defects, color variations, and dimensional stability. Dyes and chemicals should be tested for purity and concentration. Any materials that don’t meet the required standards should be rejected or returned to the supplier. Proper raw material inspection can prevent many problems from occurring later in the production process. It’s a proactive approach that saves time and money in the long run.
2. Statistical Process Control (SPC)
Statistical Process Control (SPC) is a powerful tool for monitoring and controlling manufacturing processes. It involves collecting data on key process variables, such as temperature, pressure, and speed, and analyzing the data using statistical techniques. This allows you to identify any deviations from the norm and take corrective actions before problems occur. For example, you can use SPC to monitor the weight of yarn being wound onto a bobbin. If the weight starts to drift outside the control limits, you can adjust the machine settings to bring it back into line. SPC can also be used to monitor the color of dyed fabrics. If the color starts to fade or vary, you can adjust the dyeing process to ensure consistent color quality. Implementing SPC requires training and commitment, but it can significantly improve process control and reduce defects. It’s a data-driven approach that provides valuable insights into process performance and helps you make informed decisions.
| Defect Type | Possible Cause | Corrective Action |
|---|---|---|
| Yarn Breaks | High tension, worn guides, weak yarn | Reduce tension, replace guides, use stronger yarn |
| Fabric Holes | Needle damage, mechanical wear | Replace needles, smooth abrasive surfaces |
| Color Variations | Faulty dye pump, incorrect dye concentration | Repair pump, adjust dye formulation |
| Print Misalignment | Incorrect registration, machine vibration | Adjust registration, stabilize machine |
Navigating Ethical and Sustainable Practices
Sustainability is no longer a buzzword – it’s a necessity. Consumers are increasingly demanding eco-friendly and ethically produced textiles. As a textile engineer, you need to be knowledgeable about sustainable practices and be able to implement them in your work. This includes using environmentally friendly materials, reducing waste, conserving energy, and ensuring fair labor practices. Familiarize yourself with certifications such as GOTS (Global Organic Textile Standard) and Oeko-Tex Standard 100. Learn about innovative technologies such as waterless dyeing, recycled fibers, and biodegradable materials. I remember attending a conference where I learned about a company that was using recycled plastic bottles to make high-quality polyester fabrics. It was inspiring to see how technology can be used to create sustainable solutions. By embracing ethical and sustainable practices, you can contribute to a more responsible and environmentally friendly textile industry.
1. Understanding the Importance of Sustainable Materials
Sustainable materials are at the heart of environmentally friendly textiles. They minimize the environmental impact of textile production and promote the use of renewable resources. Common sustainable materials include organic cotton, recycled polyester, and bamboo. Organic cotton is grown without the use of harmful pesticides and fertilizers, reducing the risk of soil and water contamination. Recycled polyester is made from recycled plastic bottles, reducing waste and conserving energy. Bamboo is a fast-growing, renewable resource that requires minimal water and pesticides. When selecting sustainable materials, consider their environmental impact throughout the entire lifecycle, from raw material extraction to end-of-life disposal. Look for certifications such as GOTS and Oeko-Tex to ensure that the materials meet the required environmental standards. Using sustainable materials is not only good for the planet, but it can also enhance the marketability of your products and attract environmentally conscious consumers.
2. Implementing Water and Energy Conservation Measures
Water and energy are essential resources in textile manufacturing, but they can also be major sources of pollution and environmental impact. Implementing water and energy conservation measures is crucial for reducing the environmental footprint of textile production. This includes using water-efficient dyeing and finishing processes, recycling wastewater, and optimizing energy consumption. Water-efficient dyeing processes, such as foam dyeing and supercritical CO2 dyeing, reduce water usage and minimize wastewater discharge. Wastewater recycling involves treating and reusing wastewater from textile processes, reducing the demand for fresh water. Energy conservation measures include using energy-efficient equipment, insulating buildings, and optimizing process parameters. I remember working on a project where we implemented a wastewater recycling system in a dyeing factory. It reduced water consumption by 50% and significantly reduced the factory’s environmental impact. By implementing water and energy conservation measures, you can save money, reduce your environmental impact, and improve the sustainability of your operations.
In Conclusion
Mastering these textile testing and machine operation skills requires dedication and hands-on experience. Don’t be discouraged by initial setbacks. Instead, view them as learning opportunities. Keep practicing, keep experimenting, and never stop asking questions. With persistence and a commitment to quality, you’ll be well on your way to becoming a skilled and successful textile engineer. Good luck, and happy testing!
Useful Tips and Tricks
1. Create a Lab Notebook: Document all your experiments, observations, and results in a dedicated notebook. This will help you track your progress and learn from your mistakes.
2. Join Industry Forums: Engage with other textile professionals online to share knowledge, ask questions, and stay up-to-date on the latest trends.
3. Attend Workshops and Seminars: Look for opportunities to attend workshops and seminars on textile testing and machine operation. These events can provide valuable hands-on training and networking opportunities.
4. Invest in Quality Equipment: Use reliable and calibrated equipment for accurate and consistent results. Don’t cut corners when it comes to equipment quality.
5. Stay Updated on Standards: Textile standards are constantly evolving. Stay informed about the latest updates and revisions to ensure that your testing and quality control procedures are up-to-date.
Key Takeaways
Understanding textile testing techniques, machine operation, technical drawings, defect troubleshooting, quality control, and sustainable practices is essential for success in textile engineering. Remember to practice, stay informed, and embrace continuous learning.
Frequently Asked Questions (FAQ) 📖
Q: What are the most common practical tasks I should expect on the textile engineering exam?
A: From what I’ve gathered talking to a few friends who’ve recently taken the exam, expect to be tested on fiber identification (distinguishing between cotton, polyester, wool, etc.
– maybe even with a burn test, so be careful!), yarn analysis (measuring twist, count, and identifying yarn structure), and fabric analysis (determining weave patterns like plain, twill, or satin, and calculating fabric count).
You’ll almost certainly have to operate some machinery – think spinning frames or looms. Get comfortable threading a machine, adjusting settings, and spotting common faults.
I remember one pal getting tripped up trying to set the tension on a loom – a tiny adjustment made all the difference! Keep your cool, double-check everything, and if unsure, ask the instructor.
It’s better than wrecking the machine.
Q: I’m really struggling with identifying different weave patterns.
A: ny tips for getting better at that? A2: Oh, the bane of every textile engineering student’s existence! I feel you.
A great trick I learned (the hard way, mind you, after a near-failure on a fabric analysis lab) is to invest in a good magnifying glass or even a small microscope if you can get your hands on one.
Examining the fabric’s surface close-up is crucial. Start by focusing on the repeat pattern – how many warp and weft threads are in the repeat unit? Pay attention to the float lengths (how many threads a yarn passes over or under before interlacing).
Plain weaves have the simplest 1/1 interlacing. Twills show diagonal lines, indicating yarns passing over/under multiple threads. Satin weaves have long floats, creating a smooth, lustrous surface.
I found that practicing with a variety of fabric swatches and actually diagramming the weave structure helped immensely. You can even create your own mini-weave samples with colored pencils to solidify your understanding.
Don’t just memorize; understand the construction.
Q: How important is understanding machine maintenance and troubleshooting on the practical exam?
A: Let me tell you, it’s massively important! Think of it this way: they’re not just checking if you can use the equipment; they’re assessing whether you can keep it running and fix it when things go wrong.
During my time in the lab, instructors heavily emphasized preventive maintenance. They want to see that you know how to clean and lubricate the machines, check for worn parts, and identify potential problems before they become major breakdowns.
Expect questions about troubleshooting common issues like yarn breaks, uneven tension, or incorrect speed settings. Be prepared to demonstrate your ability to identify the cause of a problem and propose a solution.
For example, if the yarn is constantly breaking, you might suggest checking the tension, the condition of the guide eyelets, or the quality of the yarn itself.
Don’t be afraid to get your hands dirty and ask questions – showing initiative and a willingness to learn will score you points, even if you don’t know everything.
Demonstrating a proactive, safety-conscious approach to machine operation and maintenance is key!
📚 References
Wikipedia Encyclopedia
구글 검색 결과
구글 검색 결과
구글 검색 결과
구글 검색 결과
구글 검색 결과